Table of Contents
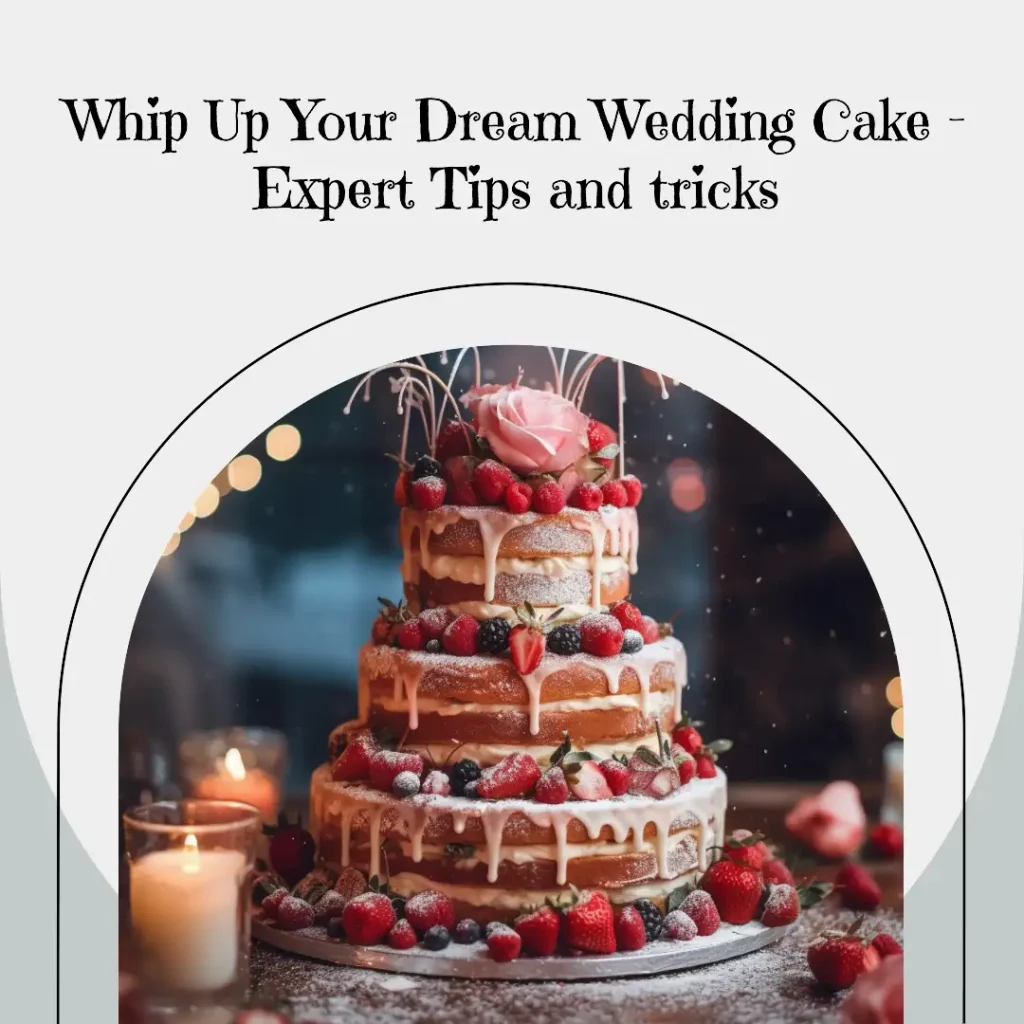
Nothing quite symbolizes the sweetness of love and unity like a wedding cake. Creating your own wedding cake can be a rewarding experience, adding a personal touch to your big day. This comprehensive guide will walk you through every step of the process, ensuring your cake is as memorable as your wedding itself.
Selecting the Perfect Cake Design
Understanding Your Wedding Theme and Style
Before choosing a cake design, take some time to understand your wedding theme and style. Consider the overall atmosphere and aesthetic you wish to create, whether it’s a formal black-tie affair, a casual beach wedding, or a cozy backyard gathering. This will guide your decision-making process as you explore various cake designs.
Exploring Popular Wedding Cake Styles
There are countless wedding cake styles to choose from, each reflecting different tastes and personalities. Here are some popular styles to consider:

- Carter, Lisa (Author)
- English (Publication Language)
- 107 Pages - 04/06/2024 (Publication Date) - Independently published (Publisher)
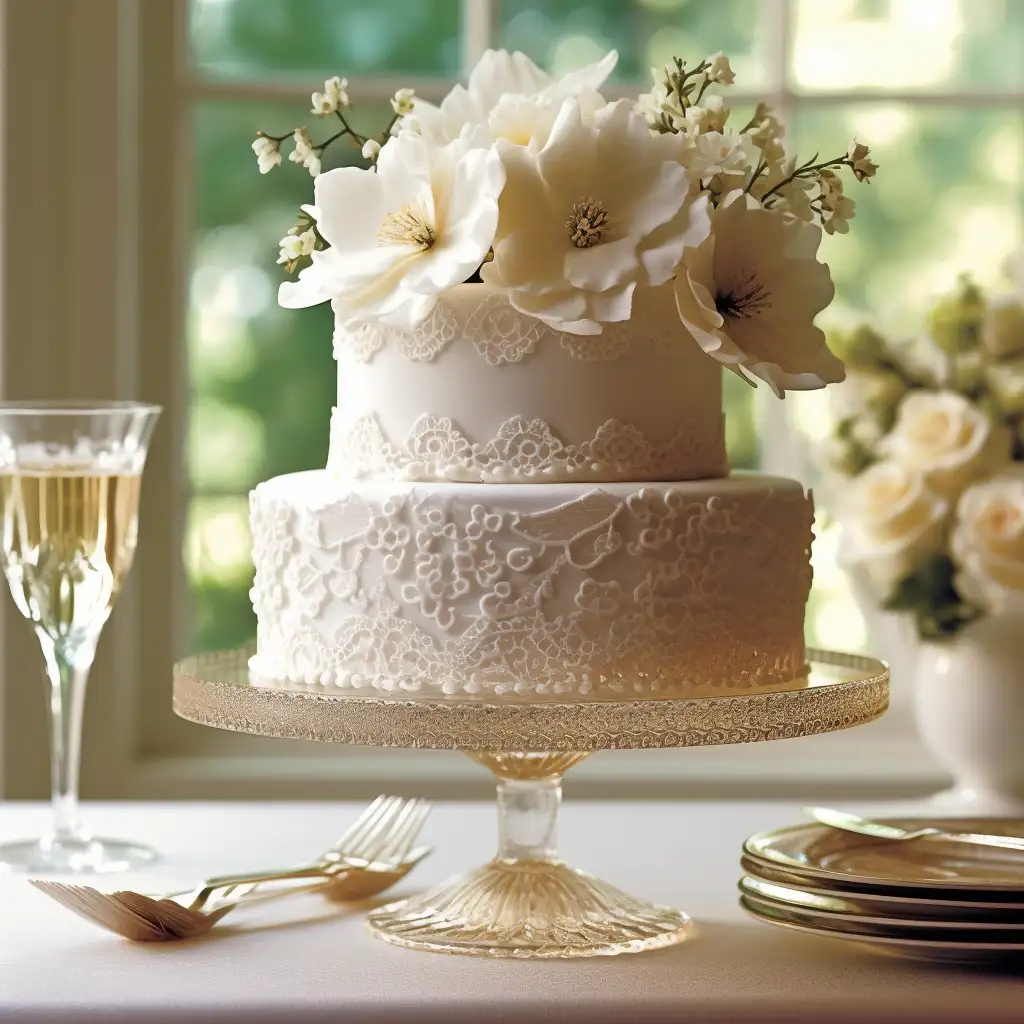
- Traditional: Classic and elegant, featuring white or ivory frosting, delicate piping, and sophisticated details such as lace patterns or sugar flowers.
- Contemporary: Bold and modern, with clean lines, geometric shapes, and unique elements like metallic accents or abstract designs.
- Rustic: Embracing a natural, organic look, with textured buttercream frosting, fresh flowers or greenery, and elements like wood, burlap, or twine.
- Whimsical: Playful and imaginative, incorporating fun elements like watercolor designs, sugar sculptures, or themed decorations related to your interests or hobbies.
Incorporating Your Color Scheme and Decorations
Your wedding cake should complement the overall color scheme and decorations of your special day. When selecting cake designs, consider elements that will tie the cake to the rest of the celebration:
- Colors: Match the cake’s frosting, fondant, or decorations to your wedding colors, using shades that harmonize with your chosen palette.
- Decorative elements: Incorporate motifs from your wedding invitations, centerpieces, or table settings into your cake design. For example, if your wedding features intricate lace tablecloths, consider incorporating a lace pattern on your cake.
- Flowers and greenery: Use fresh or sugar flowers that mirror your bridal bouquet or centerpieces and consider incorporating greenery to add texture and dimension.
Finding Inspiration
There are many sources of inspiration for your perfect wedding cake design. Browse wedding magazines, blogs, and social media platforms like Pinterest and Instagram for ideas. You can also seek inspiration from your wedding venue, cultural traditions, or even personal memories that hold special meaning for you and your partner.
Determining the Ideal Cake Size and Number of Servings
One of the key factors to consider when planning your wedding cake is determining the ideal size to accommodate the number of guests you expect to serve. The size and number of cake tiers will directly affect the number of servings your cake can provide, so it’s essential to plan accordingly.
Begin by determining the number of guests you expect to attend your wedding. Keep in mind that not all guests may indulge in cake, as some may have dietary restrictions or may be too full from the reception meal. A general rule of thumb is to plan for about 75% to 80% of your total guest count.
Next, consult a cake serving chart like the one below to help guide your decision on the size and number of tiers needed. These charts typically provide information on the number of servings based on the diameter and height of each cake tier. For example, a 6-inch round cake with a standard 4-inch height may yield 12 servings, while a 10-inch round cake of the same height may yield 38 servings. Be sure to account for any additional dessert options that may be available at your reception, as this may affect the number of cake servings needed.
As you finalize your cake design, remember that opting for a larger cake may not always be necessary. If you prefer a smaller, more intricate cake for display purposes but still need to serve a larger crowd, consider having a separate “kitchen cake” or sheet cake prepared to provide the additional servings needed. This option can be more cost-effective and ensures all guests can enjoy a delicious slice of your wedding cake.
| Cake Shape | Cake Size (in inches) | Approximate Servings |
| Round | 6 | 12 |
| Round | 8 | 24 |
| Round | 10 | 38 |
| Round | 12 | 56 |
| Round | 14 | 78 |
| Round | 16 | 100 |
| Square | 6 | 18 |
| Square | 8 | 32 |
| Square | 10 | 50 |
| Square | 12 | 72 |
| Square | 14 | 98 |
| Square | 16 | 128 |
Disclaimer: Keep in mind that this chart is for reference purposes only and may not be applicable to all cake designs or unique shapes. Consult with your baker or cake designer to determine the most appropriate cake size for your specific needs.
Tasting and Sampling Flavors
Before deciding on the flavors for your wedding cake, it’s essential to taste and sample various options. This process helps you make an informed decision and ensures that your cake is not only visually stunning but also a delightful culinary experience for you and your guests.
Many bakeries and cake designers offer tasting sessions, where you can try an assortment of cake flavors, frostings, and fillings. Don’t be afraid to ask questions and request specific combinations that interest you. Be sure to consider the preferences of your partner and the tastes of your guests, aiming for a balance of classic and unique flavors that will satisfy everyone.
When attending a tasting session, consider the following tips:
- Come prepared: Before the session, make a list of flavors and combinations you’re interested in trying. This will help you make the most of your time and ensure you don’t miss any exciting options.
- Take notes: As you sample different flavors, jot down your impressions and any standout combinations. This will make it easier to recall your preferences when it’s time to finalize your decision.
- Consider the season: The time of year can influence the availability and quality of certain ingredients, such as fruits. Choose flavors that complement the season and your wedding theme.
- Don’t rush: Take your time during the tasting session, savoring each flavor and considering how it might fit into your overall wedding menu.
Choosing the Right Cake Flavors and Fillings
Classic Wedding Cake Flavors
There are several tried-and-true cake flavors that have become wedding classics due to their wide appeal and versatility. Some popular options include:
- Vanilla: A timeless choice, offering a subtle, delicate flavor that pairs well with a variety of fillings.
- Chocolate: Rich and indulgent, this favorite can be paired with complementary flavors like raspberry, caramel, or coffee.
- Red Velvet: A sophisticated option with a distinctive red hue and subtle cocoa flavor, often paired with cream cheese frosting.
Adventurous Cake Flavor Combinations
For couples looking to make a unique statement with their wedding cake, consider experimenting with bold, unexpected flavor combinations. Some exciting options to explore are:
- Lemon and Raspberry: A zesty, refreshing choice that balances tangy lemon cake with sweet raspberry filling.
- Passion Fruit and Coconut: A tropical-inspired pairing that combines the tartness of passion fruit with the creaminess of coconut.
- Earl Grey and Lavender: A fragrant, delicate combination that infuses the subtle flavors of tea and lavender into a moist, tender cake.
Selecting the Perfect Fillings
To enhance the overall taste and texture of your wedding cake, choose fillings that complement your chosen cake flavors. Popular filling options include:
- Fruit Preserves: A sweet, tangy addition that pairs well with many cake flavors, ranging from berry preserves to citrus curds.
- Chocolate Ganache: A luxurious, velvety filling made from chocolate and cream, perfect for elevating chocolate or espresso-flavored cakes.
- Swiss Meringue Buttercream: A silky, smooth filling with a light, airy texture that can be flavored with various extracts or fruit purees to suit your cake.
Accommodating Dietary Restrictions and Preferences
It’s essential to consider the dietary needs of your guests when selecting cake flavors and fillings. Some considerations include:
- Gluten-free: Offer a gluten-free cake option for guests with celiac disease or gluten sensitivities, using alternative flours like almond or rice flour.
- Dairy-free: For lactose intolerant or vegan guests, choose dairy-free cake recipes and fillings made with plant-based milk, margarine, or non-dairy cream.
- Nut-free: Be mindful of nut allergies by selecting nut-free cake flavors and fillings and ensuring no cross-contamination occurs during the baking process.
Preparing the Ingredients and Equipment
Sourcing High-Quality Ingredients
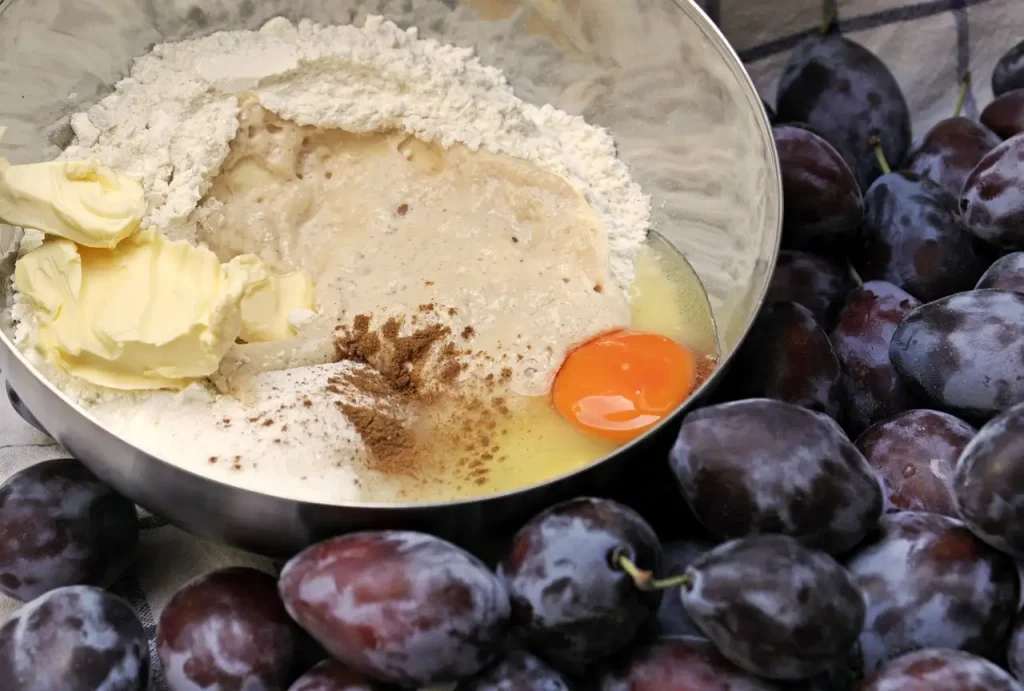
The quality of your ingredients will have a direct impact on the taste and texture of your wedding cake. To ensure the best outcome, invest in the following:
- Real butter: Choose unsalted, high-quality butter to provide richness and flavor to your cake.
- Pure vanilla extract: Choose pure vanilla extract over imitation vanilla for a more authentic, robust flavor.
- Fresh fruit: If using fruit in your cake or fillings, select ripe, fresh produce to enhance the overall taste.
Gathering Essential Baking Tools
Having the right tools on hand will make the baking process smoother and more efficient. Some essential baking tools to gather include:
- Mixing bowls: Select a variety of sizes for mixing dry and wet ingredients separately.
- Measuring cups and spoons: Ensure accurate measurements with a set of measuring cups and spoons for both dry and liquid ingredients.
- Cake pans: Use the appropriate size and shape of cake pans for your chosen design, and consider having multiple pans for efficient baking.
Organizing Your Workspace
A clutter-free, organized workspace will allow you to work more efficiently and prevent accidents. To prepare your workspace:
- Clear countertops: Remove any unnecessary items from your workspace, creating a clean, open area for assembling ingredients and equipment.
- Arrange tools and ingredients: Group tools and ingredients according to the order in which they’ll be used, making them easily accessible during the baking process.
- Sanitize surfaces: Wipe down countertops and any surfaces that will come into contact with ingredients or equipment to ensure a hygienic workspace.
Taking Safety Precautions
Safety is paramount when working in the kitchen. Keep the following precautions in mind:
- Use oven mitts: Protect your hands from burns by using oven mitts or potholders when handling hot pans or trays.
- Keep a fire extinguisher nearby: In the event of a fire, ensure you have a fire extinguisher readily available and know how to use it properly.
- Be cautious with sharp objects: When using knives or other sharp tools, exercise caution to prevent accidents, and store them safely when not in use.
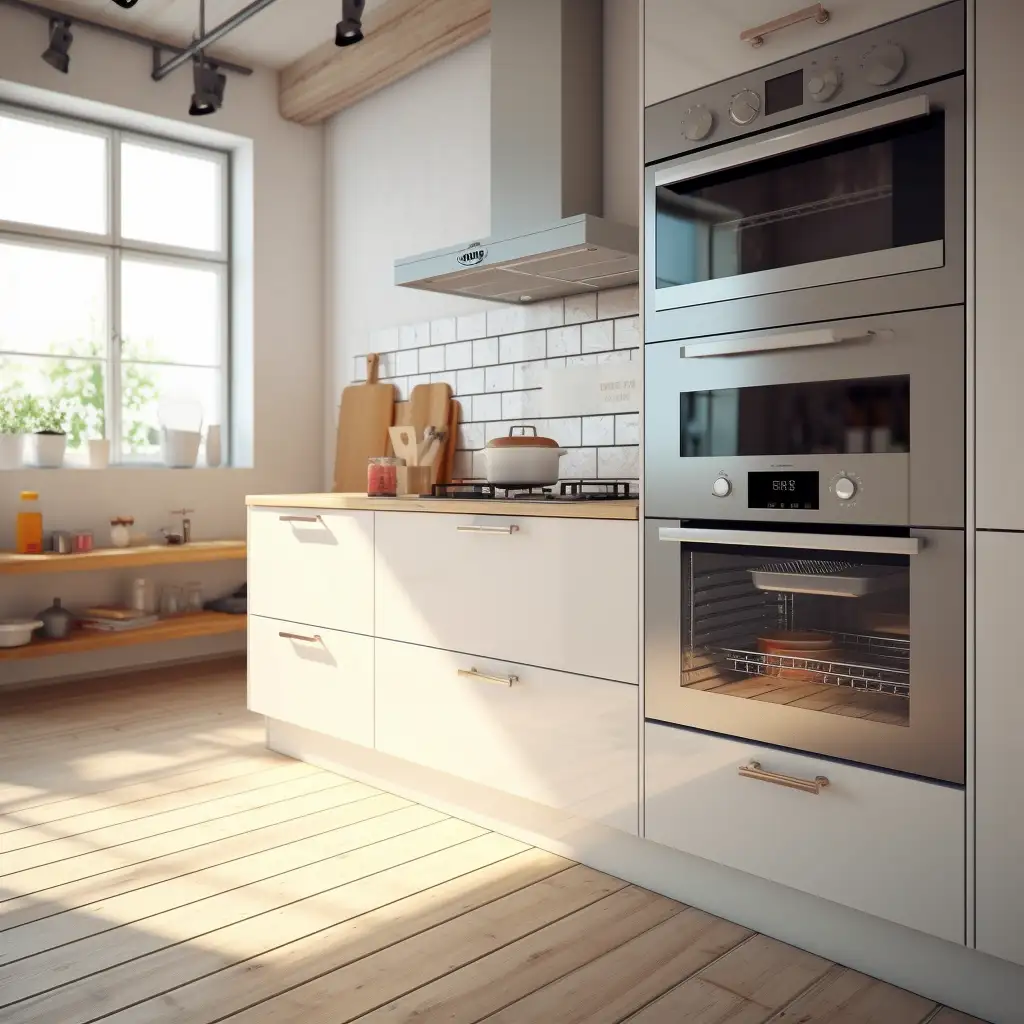
Baking the Cake Layers
Following the Recipe
To ensure a successful baking process, it’s crucial to carefully follow your chosen cake recipe. Pay close attention to the following:
- Ingredient quantities: Measure ingredients accurately to maintain the proper balance and achieve the desired texture.
- Mixing techniques: Follow the recommended mixing methods, such as creaming butter and sugar or folding in dry ingredients, to create the ideal cake structure.
- Baking times and temperatures: Adhere to the suggested baking times and oven temperatures for consistent results across each layer.
Ensuring Even Baking
To achieve evenly baked cake layers, consider using the following techniques:
- Wet towel method: Wrap a damp towel around the cake pan before baking to help maintain a consistent temperature and promote even cooking.
- Rotating pans: If your oven has hot spots, rotate the cake pans halfway through baking to ensure uniform heat distribution.
- Cake strips: Use commercial cake strips, which wrap around the pan and function similarly to the wet towel method, to promote even baking and prevent doming.
Leveling Your Cake Layers
Once your cake layers have cooled, it’s essential to level them for a professional appearance and stable assembly. Use one of the following methods:
- Serrated knife: With a gentle sawing motion, trim the domed top of the cake layer using a long, sharp serrated knife.
- Cake leveler: For more precise leveling, use a cake leveler, which has an adjustable wire that slices evenly across the cake layer.
Addressing Common Baking Issues
During the baking process, keep an eye out for common issues that may arise, and adjust accordingly:
- Overbaking: If your cake layers seem dry or overcooked, check for doneness earlier in the baking process, and remove the cake from the oven as soon as a toothpick inserted in the center comes out clean.
- Underbaking: If your cake layers are undercooked or gummy, ensure your oven is preheated to the correct temperature and extend the baking time as needed, checking for doneness at regular intervals.
- Doming: If your cake layers have a pronounced dome, use the wet towel method or cake strips to promote even baking, or level the layers after cooling.
- Stacking and Structuring the Wedding Cake
Stacking and Structuring the Wedding Cake
Selecting the Right Supports
For multi-tiered cakes, proper support is crucial to prevent collapsing or leaning. Choose from one of the following support options:
- Wooden dowels: Traditional and affordable, wooden dowels can be cut to the desired length to provide sturdy support for your cake tiers.
- Plastic cake supports: Specially designed for cake assembly, these supports are durable, easy to use, and often adjustable, making them an excellent option for tiered cakes.
Installing Supports
Inserting supports into each tier will ensure that the weight of the layers above is adequately distributed. To install supports:
- Measure the height of each cake tier to determine the appropriate length for your supports.
- Cut the dowels or adjust the plastic supports to match the height of the corresponding tier.
- Insert the supports into the cake, spacing them evenly in a circular pattern to provide maximum stability.
Stacking the Tiers
With the supports in place, carefully stack the tiers, ensuring they are centered and secure:
- Gently lift the top tier onto the bottom tier, taking care to align it properly.
- Press down lightly to secure the top tier in place, ensuring it sits flush against the supports.
- Repeat this process for any additional tiers, double-checking the alignment and stability of each layer.
Ensuring Cake Stability
To prevent accidents, it’s essential to check the stability of your cake before moving on to the decorating phase:
- Gently press on the top tier to test the cake’s resistance and ensure the supports are holding the weight properly.
- Examine the cake from all angles to verify that the tiers are level and aligned.
- If necessary, adjust the supports or add additional dowels for increased stability.
Assembling and Frosting the Cake
Preparing Frostings and Fillings
Before assembling your cake, ensure your chosen frostings and fillings are ready. Follow your recipes closely and make any necessary adjustments for consistency or flavor. Remember to consider any dietary restrictions when preparing these components.
Applying the Crumb Coat
A crumb coat is a thin layer of frosting that seals in any crumbs before the final layer of frosting is applied. To apply a crumb coat:
- Spread a thin layer of frosting over the entire cake, covering the top and sides evenly.
- Use an offset spatula or a bench scraper to smooth the frosting, removing any excess.
- Chill the cake in the refrigerator for at least 30 minutes to set the crumb coat and provide a stable surface for the final layer of frosting.
Frosting the Cake
With the crumb coat set, it’s time to apply the final layer of frosting:
- Apply a generous amount of frosting to the top and sides of the cake, ensuring even coverage.
- Use an offset spatula or a bench scraper to smooth the frosting, achieving a polished, professional finish. For a rustic or textured look, use the spatula to create swoops or swirls in the frosting.
- If desired, add any additional decorative elements, such as piped borders, sugar flowers, or edible accents.
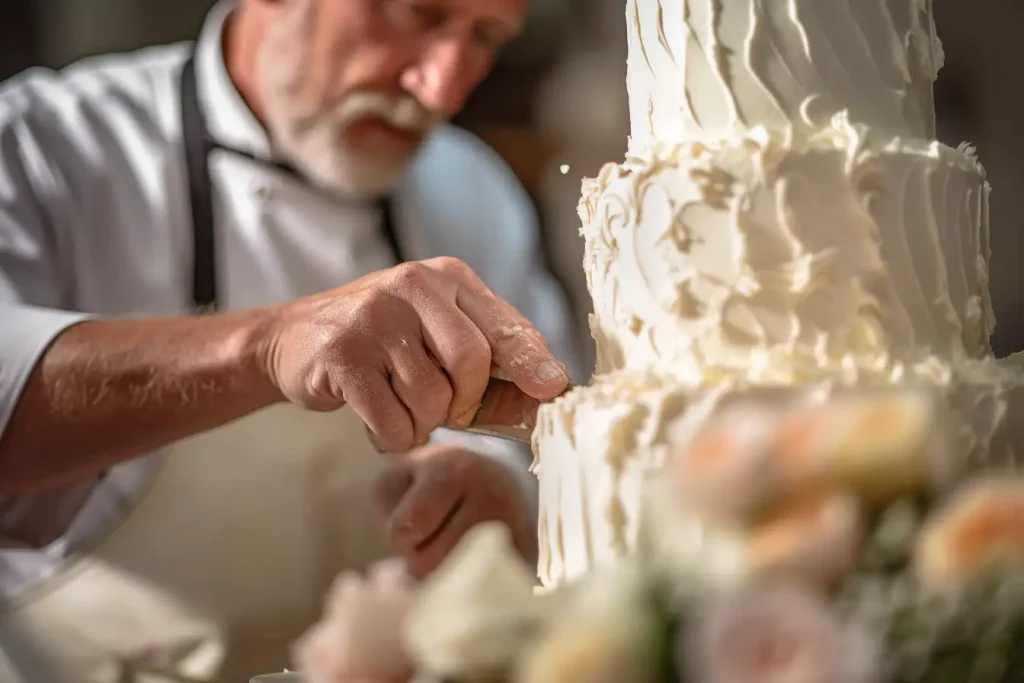
Decorating the Wedding Cake
Selecting Edible Decorations
Choose from a wide array of edible decorations to adorn your wedding cake. Some popular options include:
- Fresh flowers: Add a touch of natural beauty with fresh blooms that match your wedding theme and color palette. Ensure the flowers are food-safe and pesticide-free.
- Fruits: Use fresh, ripe fruits like berries, citrus, or figs to add color and flavor to your cake.
- Sugar art: Create stunning, intricate designs with sugar art, such as gum paste flowers, sugar lace, or fondant cut-outs.
Incorporating Non-Edible Accents
For an additional touch of personalization, consider using non-edible accents to embellish your cake:
- Cake toppers: Choose a cake topper that represents you as a couple, such as personalized figurines, monograms, or symbols.
- Ribbons: Wrap a ribbon around the base of each tier to add texture and color, coordinating with your wedding theme.
- Small figurines: Include small figurines or keepsakes that hold sentimental value or represent your hobbies and interests.
Mastering Decorating Techniques
To achieve a professional finish, learn various techniques for applying intricate designs to your wedding cake:
- Piping: Use a piping bag and various tips to create elegant designs like lacework, scrollwork, or filigree.
- Stenciling: Apply frosting or edible paint through a stencil to create patterns, textures, or monograms on your cake.
- Painting: Use edible paint or luster dust mixed with vodka or lemon extract to hand-paint designs, scenes, or metallic accents directly onto your cake.
Transporting and Displaying the Wedding Cake
Preparing for Cake Transportation
Safely transporting your masterpiece is crucial. Take the following steps to prepare your cake for transit:
- Sturdy cake box or container: Use a cake box or container that is large enough to accommodate your cake without touching the sides or decorations.
- Non-slip material: Place non-slip material, such as shelf liner or silicone baking mats, between the cake board and the box or container to prevent shifting during transit.
Transporting the Cake
When moving your cake to the venue, keep the following tips in mind:
- Vehicle preparation: Clear a flat, stable space in your vehicle and adjust the temperature to prevent the cake from melting or becoming too cold.
- Driving cautiously: Drive slowly and carefully, especially when taking turns or going over bumps, to avoid damaging the cake during transit.
- Extra supplies: Bring along extra frosting, decorations, and tools for any last-minute touch-ups or repairs.

Setting Up the Cake Display
Once at the venue, create an enticing cake display with the following elements:
- Cake stand: Choose a beautiful cake stand that complements your wedding theme and enhances the appearance of your cake.
- Table setup: Arrange a table in a prominent location with a tablecloth, floral arrangements, and other decorations that coordinate with your wedding design.
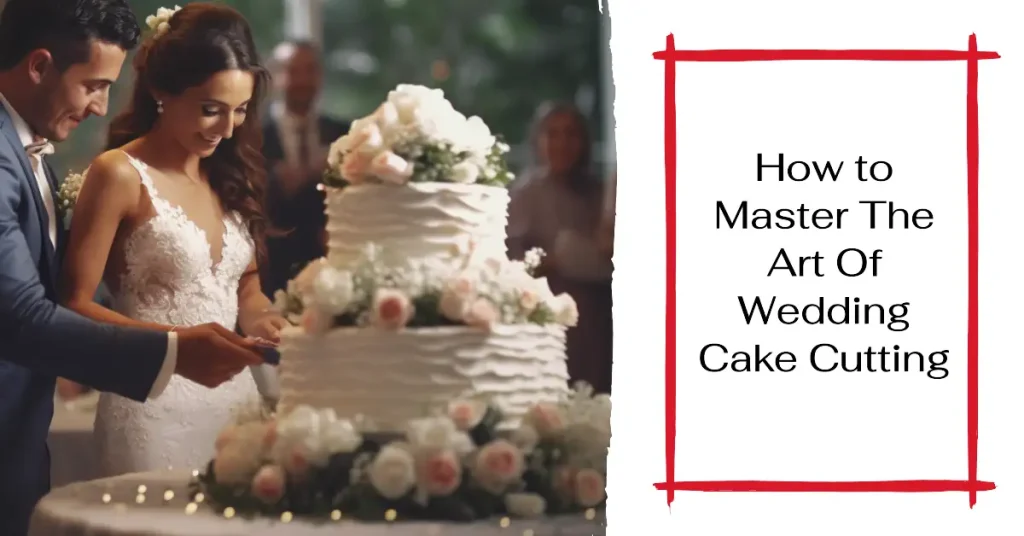
Cutting and Serving the Cake
When it’s time to cut and serve the cake, ensure a smooth process with these tips:
- Designated person: Have a designated person, such as a member of the catering staff or a trusted friend, ready to assist with cutting and serving the cake.
- Cutting tools: Provide a sharp, serrated knife and a cake server for slicing and serving the cake with ease.
- Serving plates: Arrange coordinating dessert plates and utensils nearby for guests to enjoy their cake in style.
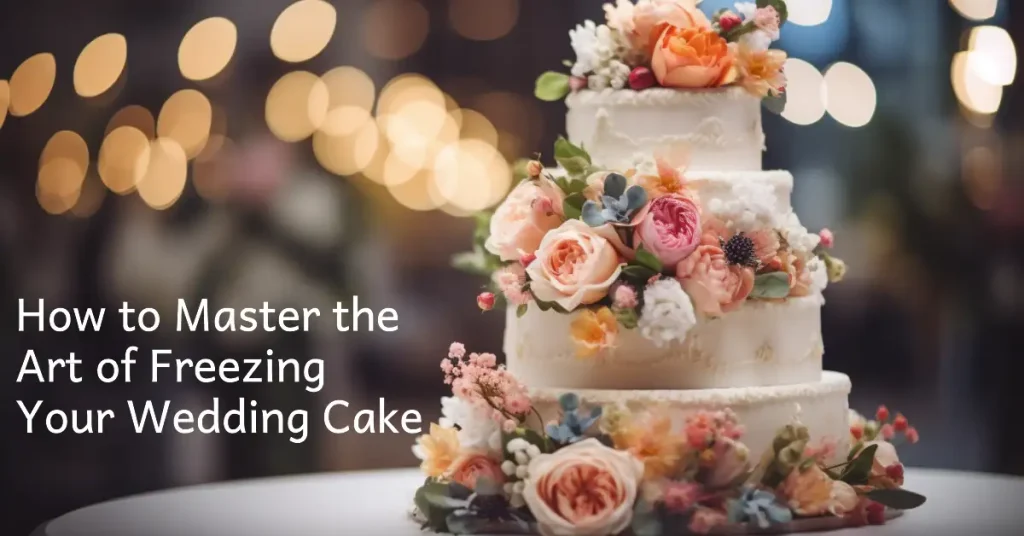
Preserving the Top Tier for Your First Anniversary
A cherished tradition for many couples is to save the top tier of their wedding cake and enjoy it on their first anniversary. This sentimental custom allows you to reminisce about your special day while savoring a delicious slice of your wedding cake. To ensure the cake remains fresh and flavorful, follow these steps to properly preserve it:
- Remove decorations: Before freezing the cake, carefully remove any non-edible decorations, such as flowers, ribbons, or cake toppers. Additionally, remove any buttercream or fondant decorations that may not freeze well.
- Chill the cake: Place the cake uncovered in the refrigerator for a few hours or overnight. This step will help firm up the frosting and prevent it from sticking to the wrapping material during the freezing process.
- Wrap the cake: Once chilled, wrap the cake in several layers of plastic wrap, ensuring that it is tightly sealed to prevent air and moisture from entering. For added protection, you may also wrap the cake in a layer of aluminum foil.
- Store in an airtight container: Place the wrapped cake inside an airtight container or a heavy-duty plastic freezer bag to further protect it from freezer burn and odors.
- Label and freeze: Label the container with the date and a reminder of the occasion. Store the cake in the coldest part of your freezer, away from any items that may emit strong odors.
To enjoy your preserved top tier on your first anniversary, follow these simple steps:
- Thaw the cake: About 24 to 48 hours before your anniversary, transfer the cake from the freezer to the refrigerator to allow it to thaw slowly.
- Unwrap and serve: On your anniversary, remove the cake from the refrigerator, unwrap it, and let it sit at room temperature for about 30 minutes to an hour before serving.
How to Make a Wedding Cake – Conclusion
The process of making your own wedding cake can be a labor of love, but the result is well worth the effort. As you and your partner cut into your cake, you’ll cherish not only the delicious flavors but also the memories and moments created during its creation. By following this guide, you’ll have a wedding cake that is a beautiful and delicious representation of your love story, leaving a lasting impression on both you and your guests.
FAQs
Q: What ingredients do I need to make a wedding cake?
A: You’ll need flour, sugar, eggs, butter, baking powder, milk, and vanilla extract.
Q: What size should the cake be?
A: The size of the cake depends on the number of guests. A typical wedding cake has three tiers, with the bottom tier being 12 inches, the middle tier being 9 inches, and the top tier being 6 inches.
Q: How long does it take to bake a wedding cake?
A: The baking time depends on the size of the cake and the oven temperature. It can take anywhere from 30 minutes to an hour for each layer.
Q: Can I make the cake ahead of time?
A: Yes, you can make the cake ahead of time and freeze the layers until you’re ready to assemble and decorate the cake. Be sure to wrap each layer tightly in plastic wrap to prevent freezer burn.
Q: What if I don’t have experience baking cakes?
A: Making a wedding cake can be challenging, especially if you don’t have experience. Consider taking a cake decorating class or working with a professional baker to ensure your cake turns out beautifully.
Q: Can I use a boxed cake mix instead of making the cake from scratch?
A: Yes, you can use a boxed cake mix to save time and simplify the process. Follow the instructions on the box and add any additional ingredients or flavors as desired.
Q: How far in advance should I start making the wedding cake?
A: It’s best to start making the cake a few days before the wedding to allow time for baking, cooling, decorating, and transportation. Be sure to factor in any time needed for freezing the cake layers.
Q: How can I make sure the cake is moist and flavorful?
A: To keep the cake moist and flavorful, use quality ingredients, avoid overmixing the batter, and add a simple syrup to each layer before adding frosting. You can also experiment with different flavors and fillings to add variety.
Q: How can I make the cake look professional?
A: Use a frosting spatula and pastry bags with tips to create clean lines and designs on the cake. Keep the cake level and use a cake turntable if possible to make decorating easier. Practice your decorating skills ahead of time to ensure a professional-looking result.
Q: Can I make a gluten-free or vegan wedding cake?
A: Yes, you can make a gluten-free or vegan wedding cake by using alternative flours such as almond flour, coconut flour, or gluten-free flour blends, and egg substitutes like flax eggs or applesauce. There are also vegan butter and cream cheese substitutes for frosting and fillings.
Q: How can I make sure the cake stays fresh until the wedding day?
A: Wrap each layer tightly in plastic wrap and store in the refrigerator or freezer until you’re ready to assemble and decorate the cake. Add a simple syrup or sugar syrup to each layer to keep it moist. Avoid leaving the cake in direct sunlight or in a warm environment.
Q: How do I cut the cake at the wedding?
A: Use a sharp knife or cake cutter to cut each layer of the cake into even slices. Be sure to cut all the way through the layers to ensure each slice has all the flavors and fillings. Serve the cake on plates or dessert plates with forks.
Q: How can I personalize the wedding cake for the couple?
A: Consider adding personalized cake toppers, using the couple’s favorite flavors, or incorporating their wedding colors or theme into the decoration. You can also add a personal message or quote to the cake using frosting or fondant.
Q: What if something goes wrong with the cake on the wedding day?
A: If something goes wrong with the cake on the wedding day, don’t panic. Try to fix the issue if possible, such as covering smudged frosting with fresh flowers or ribbon. If the issue is beyond repair, have a backup plan such as a small cake or cupcakes to serve instead. Remember, it’s the thought and effort that counts.
Key Takeaways
- Selecting the Perfect Cake Design: Consider your wedding theme and style when choosing a cake design.
- Exploring Popular Wedding Cake Styles: Traditional, contemporary, rustic, and floral/greenery are popular styles to consider.
- Finding Inspiration: Browse wedding magazines, blogs, and social media platforms for ideas and draw inspiration from your venue, cultural traditions, and personal memories.
- Determining the Ideal Size: Estimate the number of guests and consult a cake serving chart to determine the size and number of tiers needed.
- Tasting and Sampling Flavors: Attend tasting sessions to try different cake flavors, frostings, and fillings. Consider the preferences of your partner and guests.
- Choosing Cake Flavors and Fillings: Classic flavors like vanilla, chocolate, and red velvet are popular, but you can also experiment with adventurous combinations. Pair fillings that complement the cake flavors.
- Preparing Ingredients and Equipment: Source high-quality ingredients like real butter, pure vanilla extract, and fresh fruit. Gather essential baking tools and organize your workspace.
- Baking the Cake Layers: Follow the recipe closely, ensuring accurate measurements and adhering to recommended mixing techniques, baking times, and temperatures.
- Stacking and Structuring the Cake: Choose appropriate supports like wooden dowels or plastic cake supports for multi-tiered cakes. Install supports and stack tiers carefully to ensure stability.
- Assembling and Frosting the Cake: Apply a crumb coat to seal in crumbs, chill the cake, and then apply the final layer of frosting. Use piping, stenciling, or painting techniques for decoration.
- Transporting and Displaying the Cake: Use a sturdy cake box or container and non-slip material for transportation. Set up a cake display with a beautiful cake stand and coordinated table decorations.
- Cutting and Serving the Cake: Designate someone to assist with cutting and serving using sharp tools. Provide serving plates and utensils for guests.
- Preserving the Top Tier: Wrap the top tier in plastic wrap and store it in an airtight container in the freezer for enjoying on your first anniversary.
COPYRIGHT NOTICE
Please be advised that all images, designs, and creative content on this page are the exclusive property of TheIDoGuide.com and are protected under international copyright laws. The images may not be reproduced, copied, transmitted or manipulated without the written permission of TheIDoGuide.com.
Unauthorized use, distribution, display, or creation of derivative works of any images contained on this site, is strictly prohibited and can lead to legal penalties. We actively monitor for, and enforce, our copyright interests.
If you wish to use any of our images, kindly contact us to seek permission. Respect of copyright is not merely a legal requirement but also an acknowledgement and support of the hard work and creativity that goes into producing them.
Thank you for your understanding and cooperation.
© 2023, TheIDoGuide.com. All Rights Reserved.